On this page:
Setting up WHMCS AC Connector
Please read these instructions carefully and follow them in order. Things may not work otherwise.
- Make sure that aC can “see” WHMCS – the WHMCS API URL must be accessible from activeCollab.
- Upload WHMCS AC Connector module and authentication provider files to activeCollab. Do not forget to upload files in “auth_providers” folder.
- Install the module from activeCollab admin
- Edit “config.php” file in activeCollab. Add
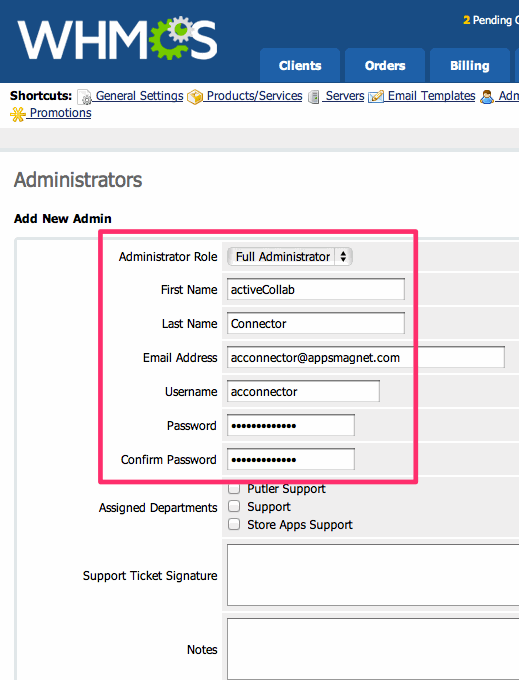
define('AUTH_PROVIDER', 'WHMCSAuthenticationProvider');line after other configuration options. Save the file. - Login to WHMCS admin, and create a new Administrator.

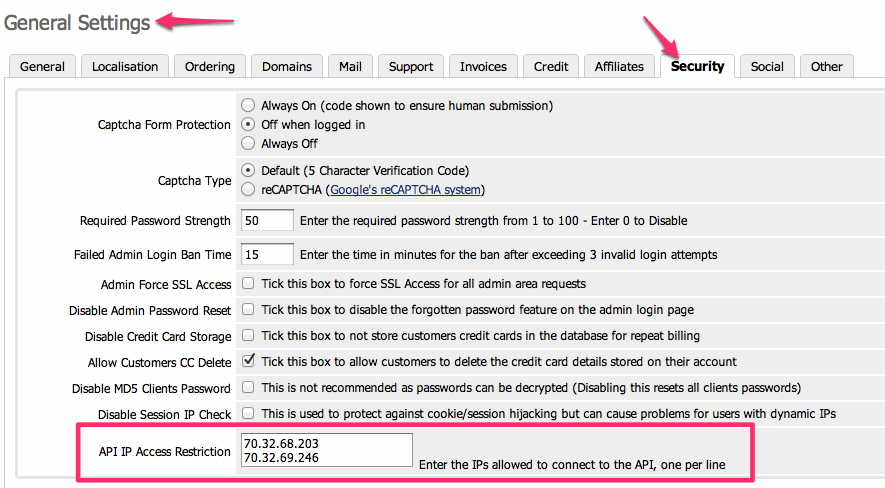
- If your activeCollab setup has a fixed public IP, enter it in the General Settings – Security – API IP Access Restriction area. If not, add an API Access Key in your WHMCS “configuration.php” file. (More on this in WHMCS documentation)

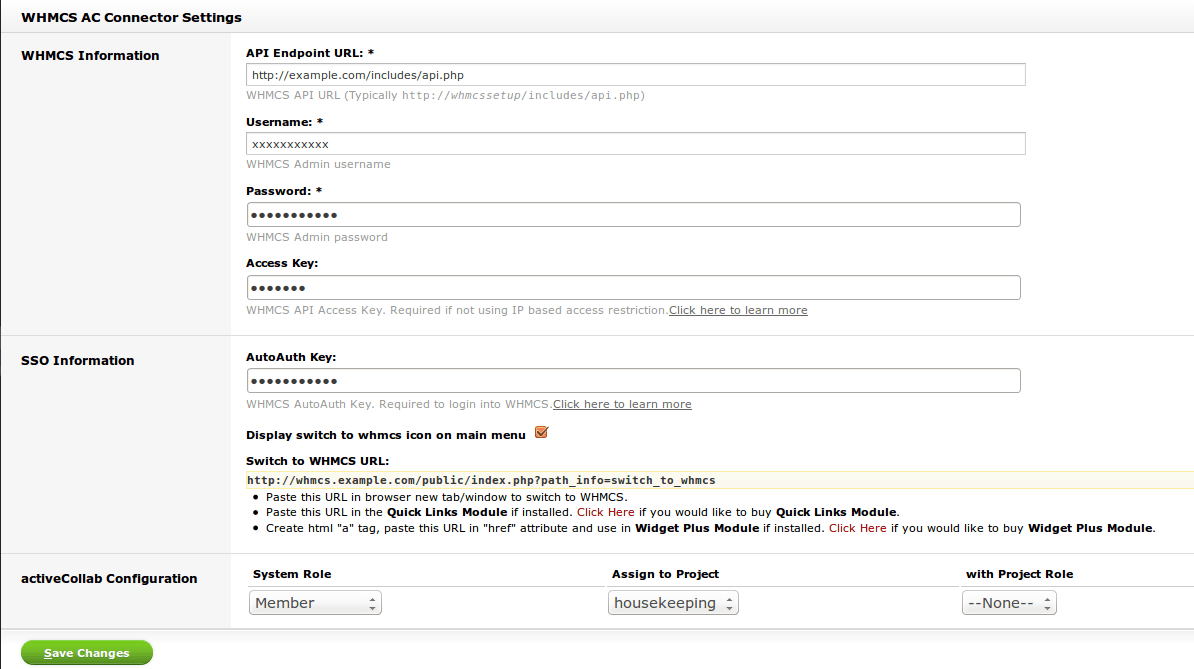
- Come to activeCollab Admin. Go to WHMCS AC Connector settings.
- Enter URL of your WHMCS API (typically http://yourwhmcsdomain/includes/api.php), the newly created admin username and password. Enter the API Access Key if you are not using IP Restriction.

- Also choose the activeCollab system role for users created from WHMCS
- Optionally, you can also select a project and project role to assign to newly created users here.
- Save changes in activeCollab.
Testing WHMCS AC Connectivity
- Create a new client user in WHMCS. Login as that user in activeCollab admin. This should create a new user in activeCollab and log him in.
- Update a user’s password in WHMCS. Login with the new password in activeCollab. This should work.


